2024-01-31
How to Use Google’s Indexing API to Crawl Your Website ASAP

Get Your Website Crawled Instantly Using Google Indexing API
We’re about to explore how you can leverage Google’s cutting-edge indexing API to instantly crawl your website’s pages and content, without any waiting time! 🚀
Here’s why this is absolutely worth it:
- Achieve rapid ranking, especially crucial for time-sensitive content
- Enhance your chances of outperforming your competitors in search results
- Keep your search results fresh for top-quality user traffic
With IndexASAP, you can proactively ensure that your site is crawled and gets the opportunity to rank before your competitors, which is particularly vital for time-sensitive and competitive content.
While the setup process may not be a walk in the park, following this step-by-step guide will have you up and running (or should I say up and ranking) in no time! So, without further ado – let’s dive right in and explore how to set this up.
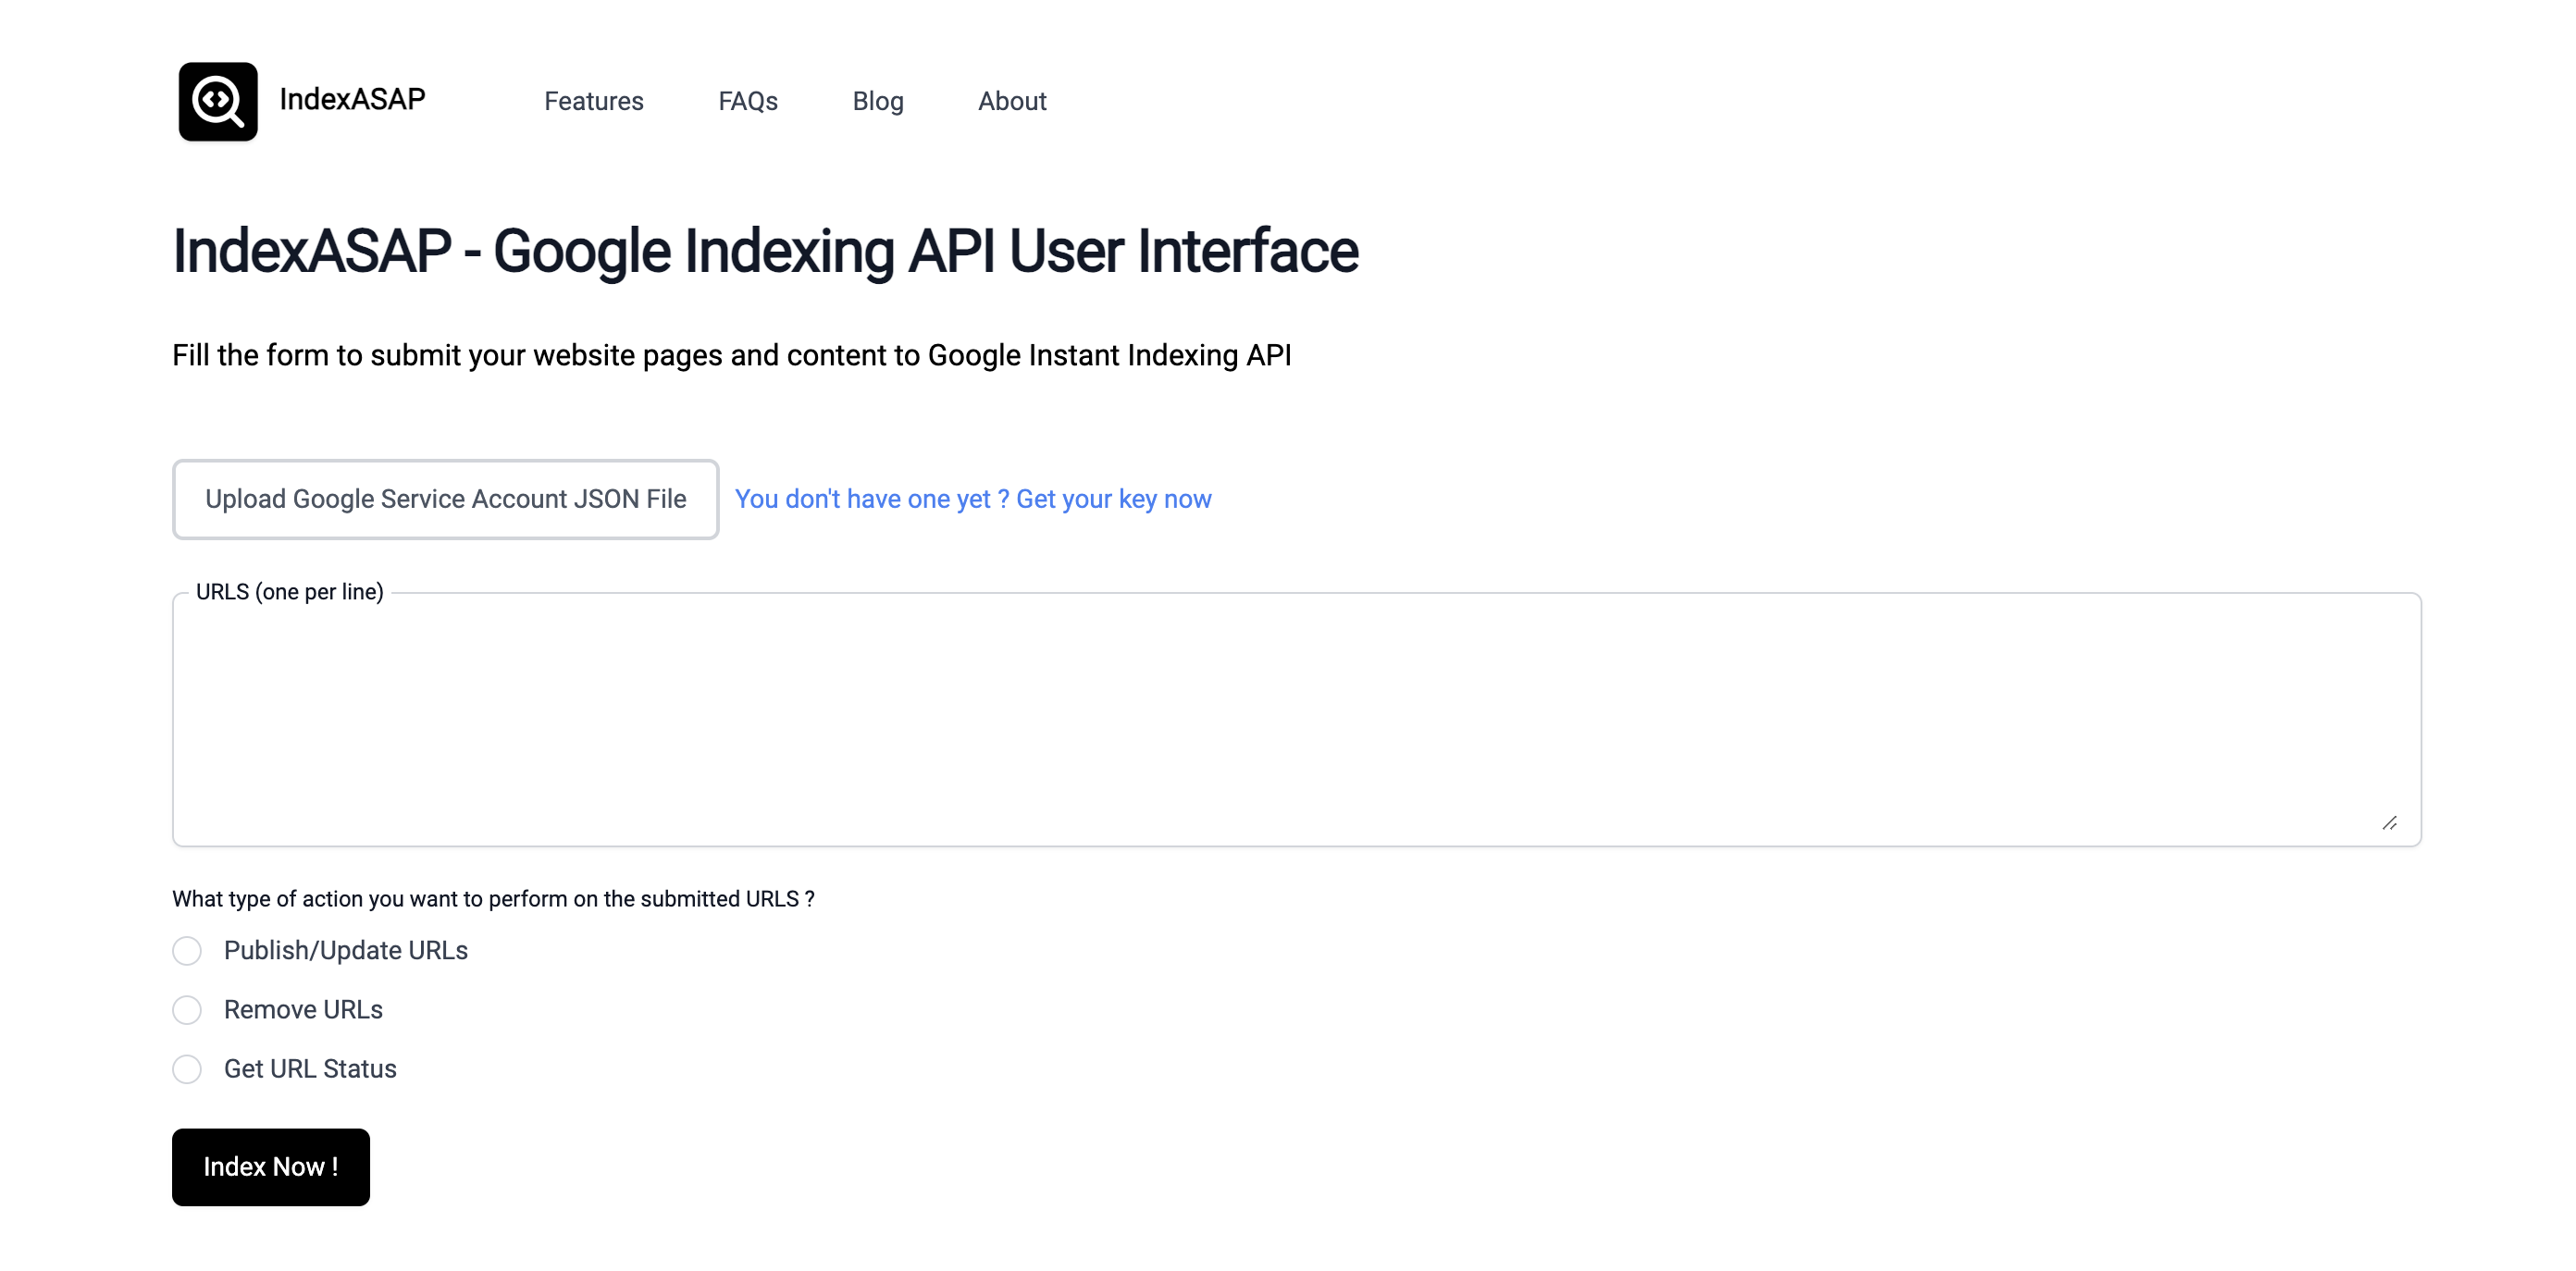
Use IndexASAP User Friendly Interface
We offer a simple and user-friendly interface to help manage the indexation and communication with Google Indexing API. Before using it, you'll need to have a service account JSON file, as that will be the key to gaining Google's trust as the owner of the site you want to index.
The only requirement to use our tool is to have that JSON file, so it's a one-time setup in the Google Cloud and console dashboards.
Once you have your key, you can go to our FREE online tool and provide the key and URLs you want to index or check the status of.
That's it!
Ignore the following steps if you already have the service key json file.
Steps to Get an Indexing API Project Service Key
In order to download your Google service key you need to follow the next 3 steps in order to create a project on Google Cloud Platform that will use the Indexing API to request Google to crawl and index your website pages.
1. Go to Google Cloud Platform
Visit the Google Cloud Platform website and sign in to your account.
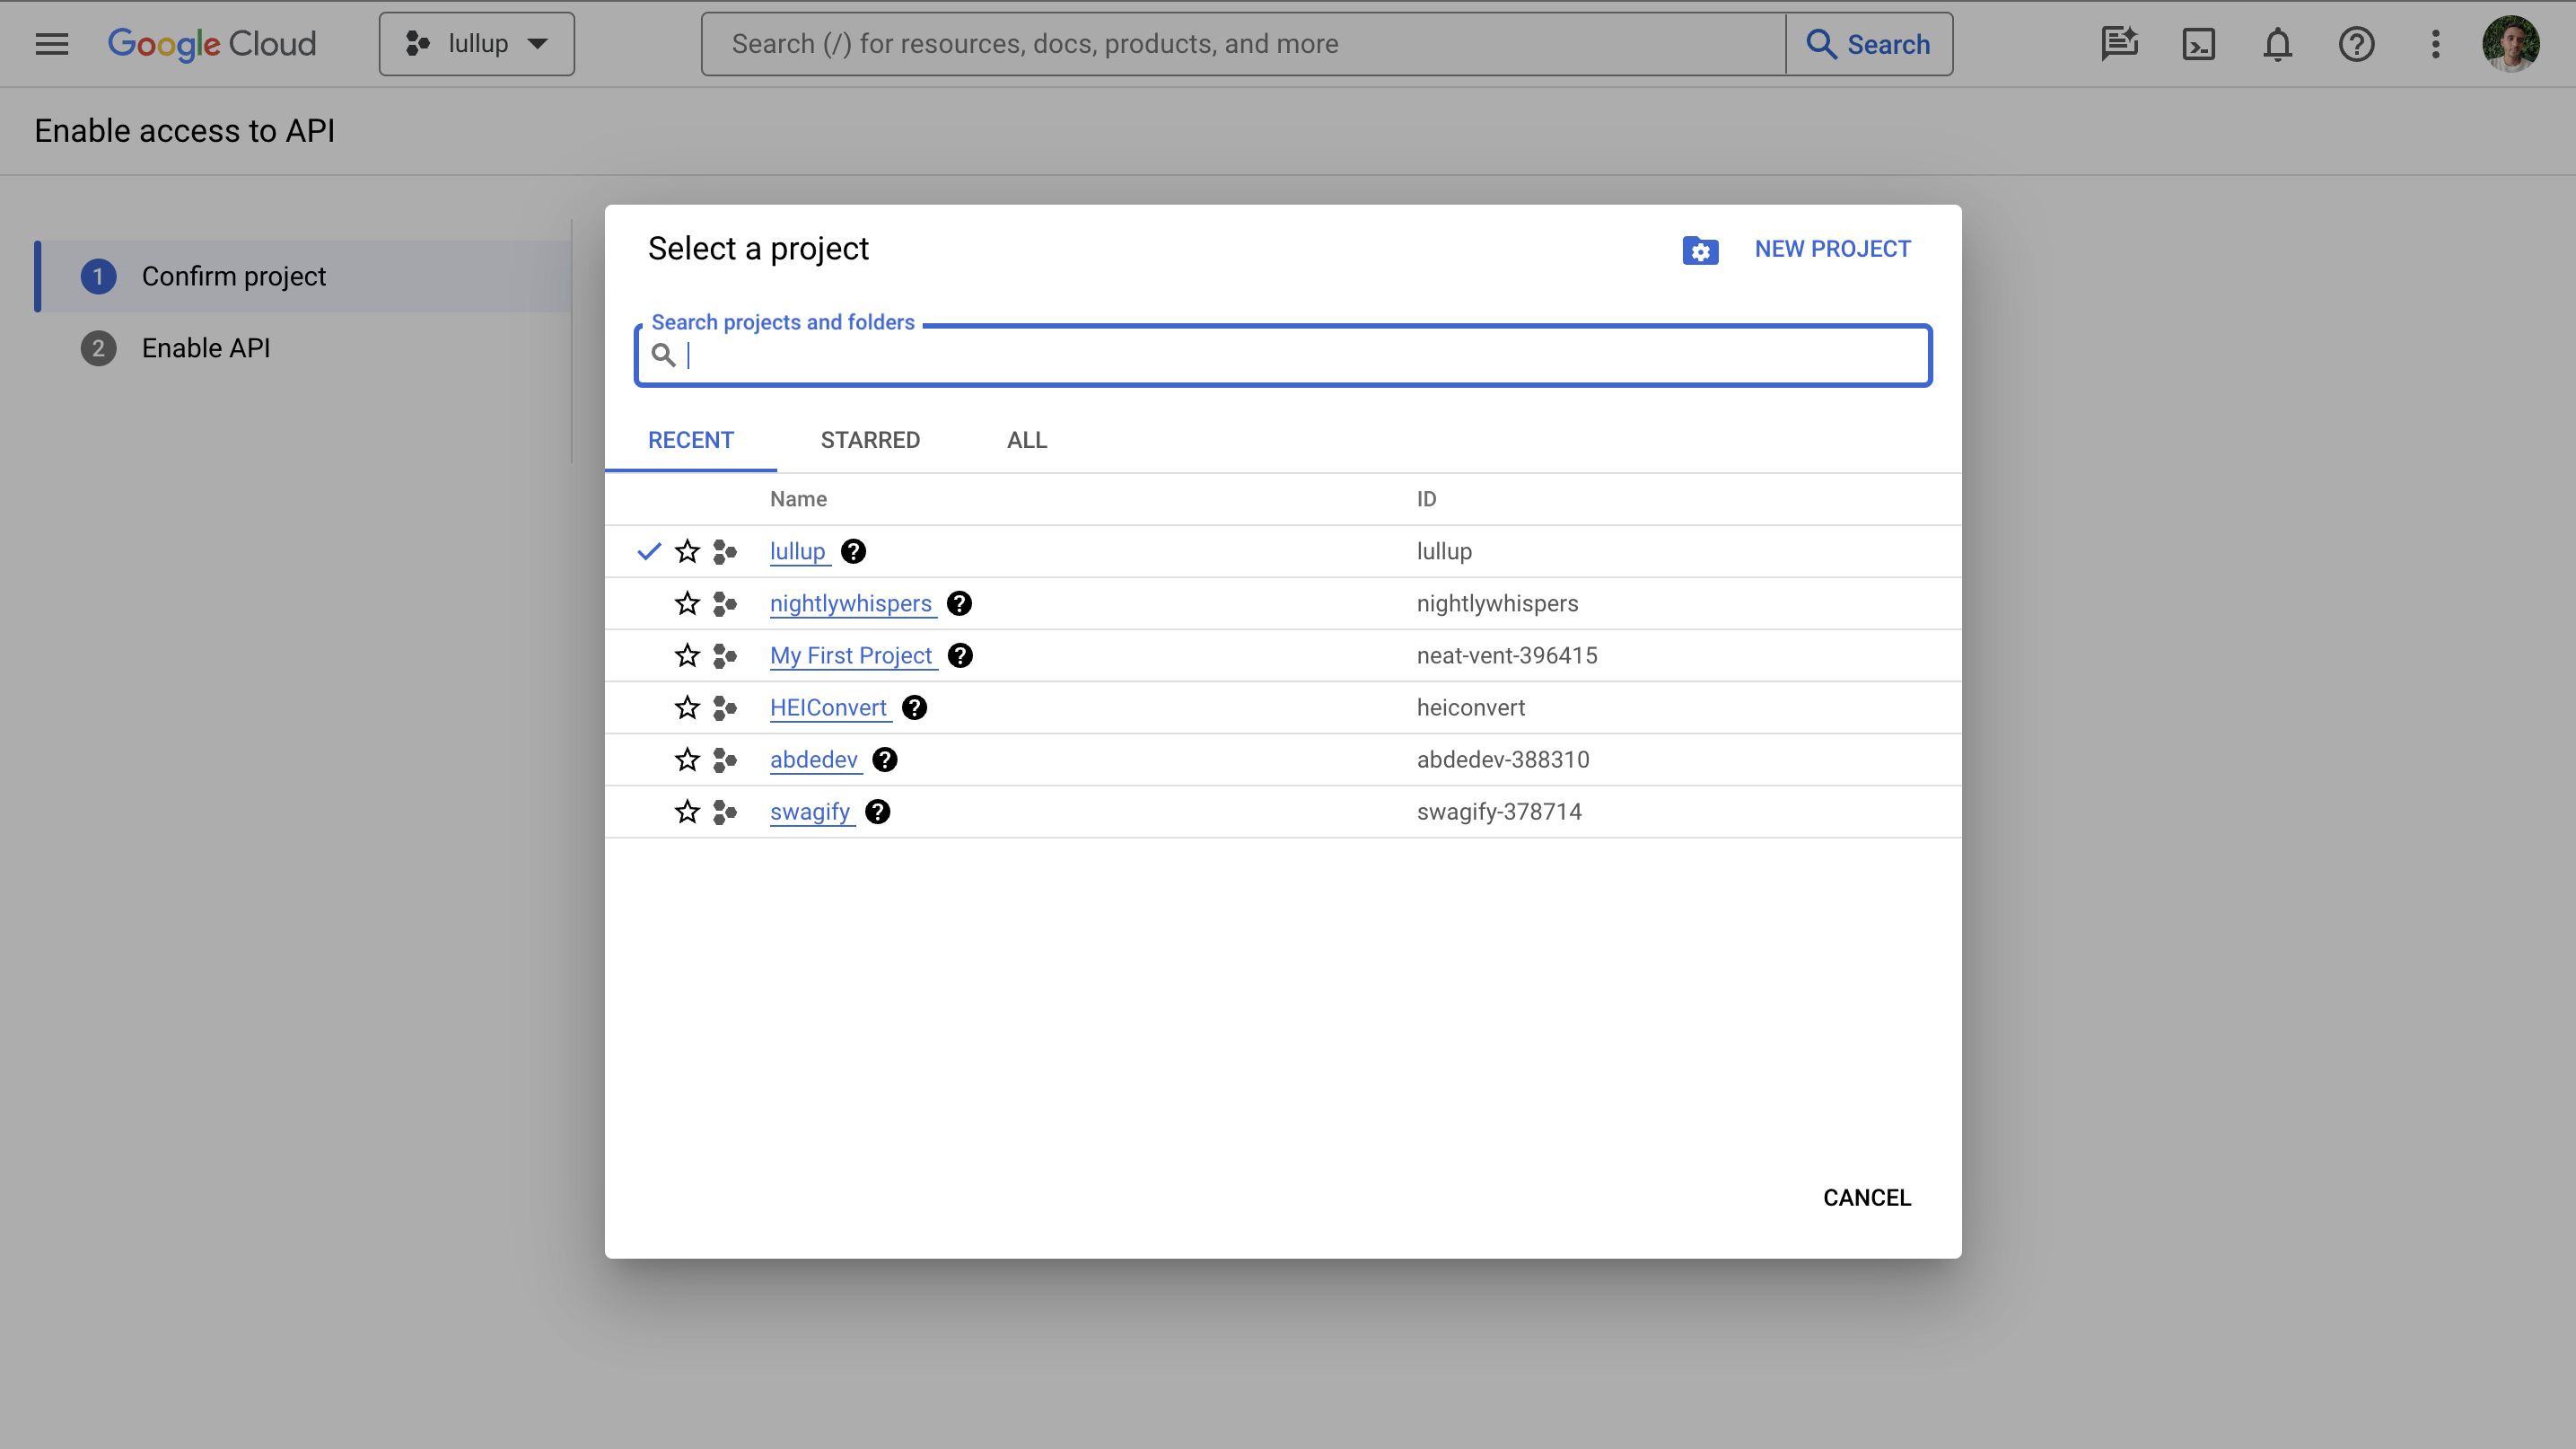
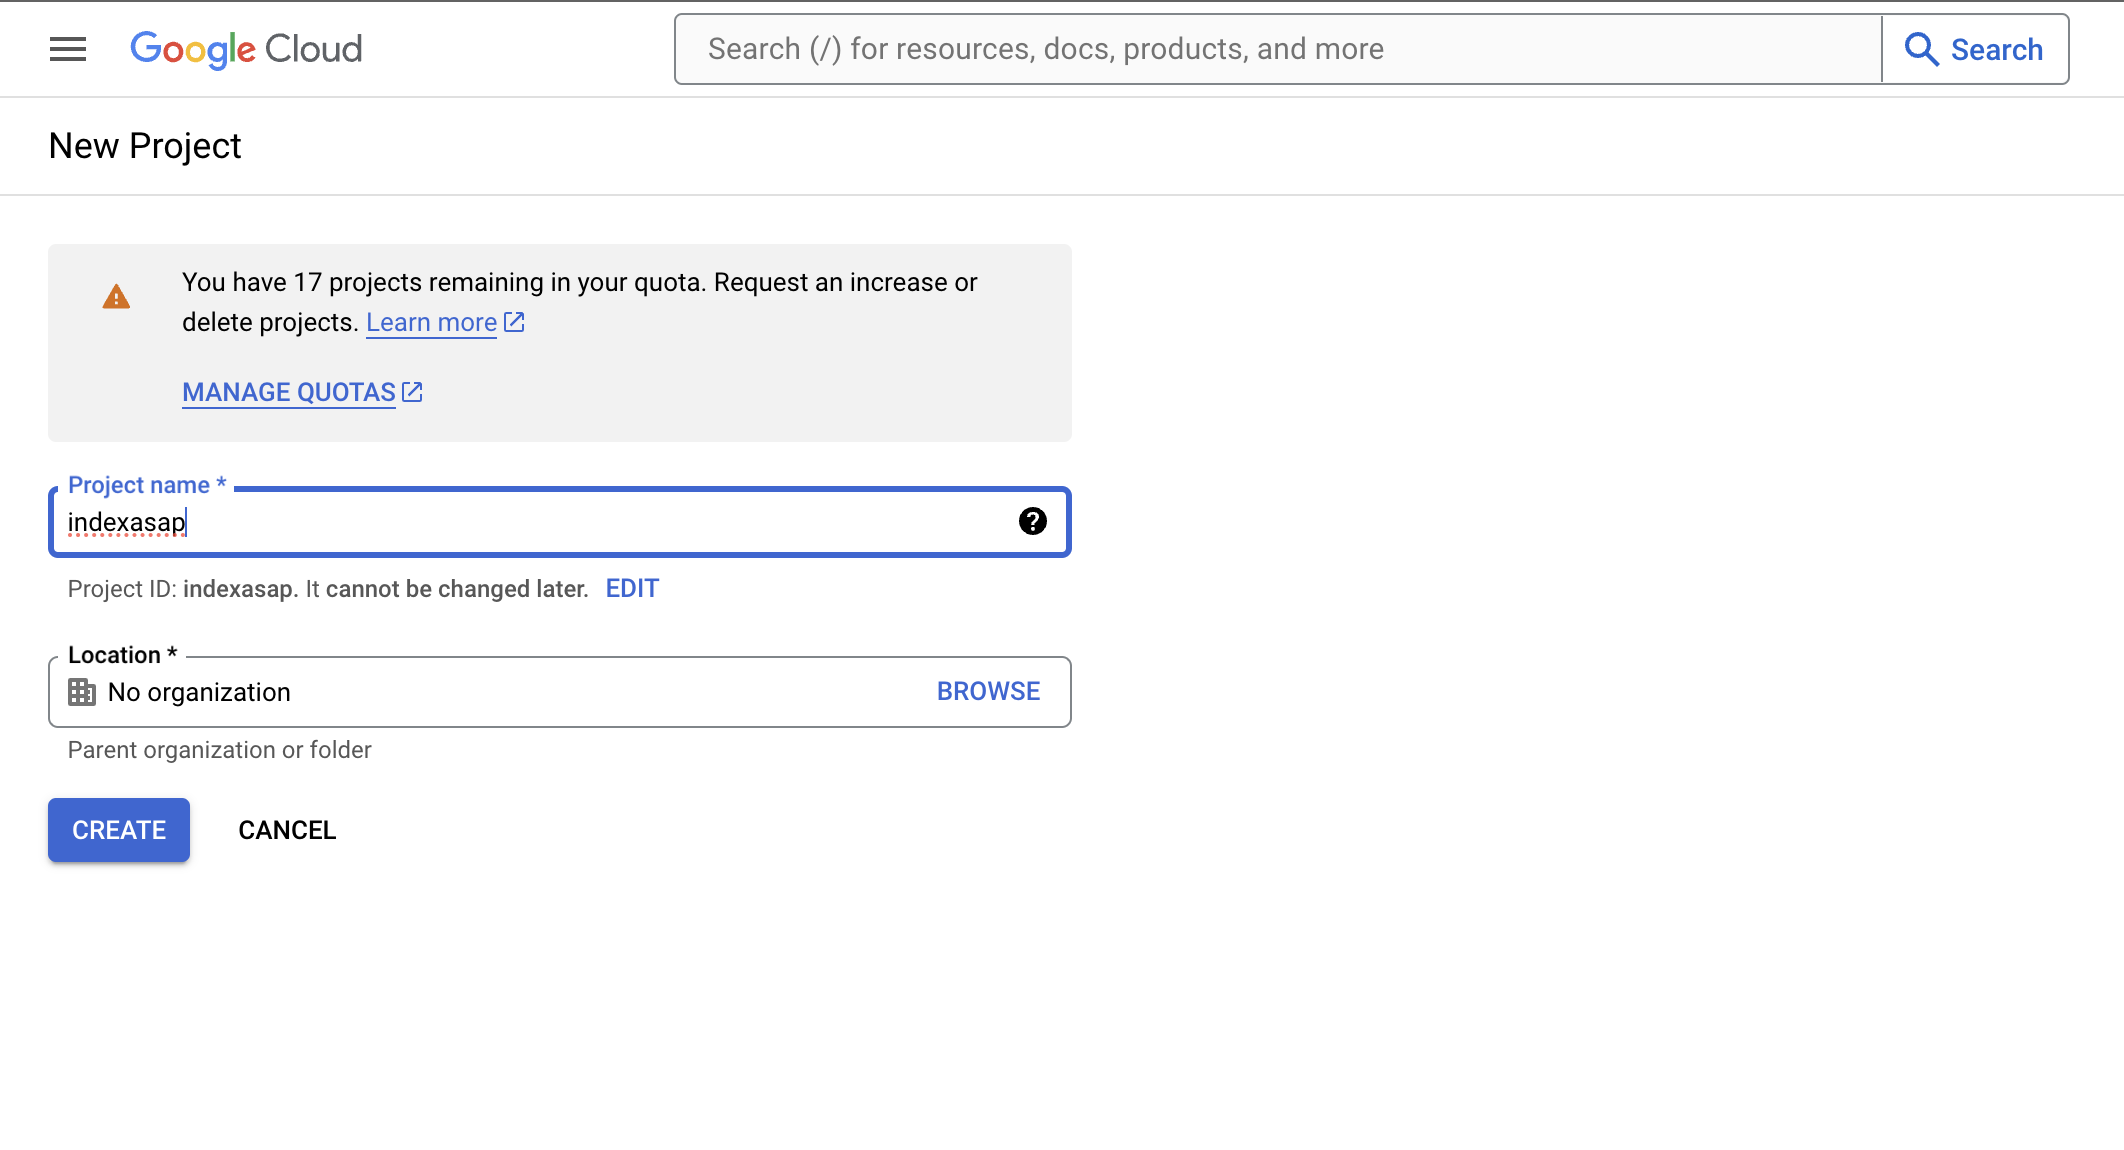
2. Create a New Project
Click on the “Select a Project” dropdown menu and select “New Project”. Enter a name for your project and click the “Create” button.
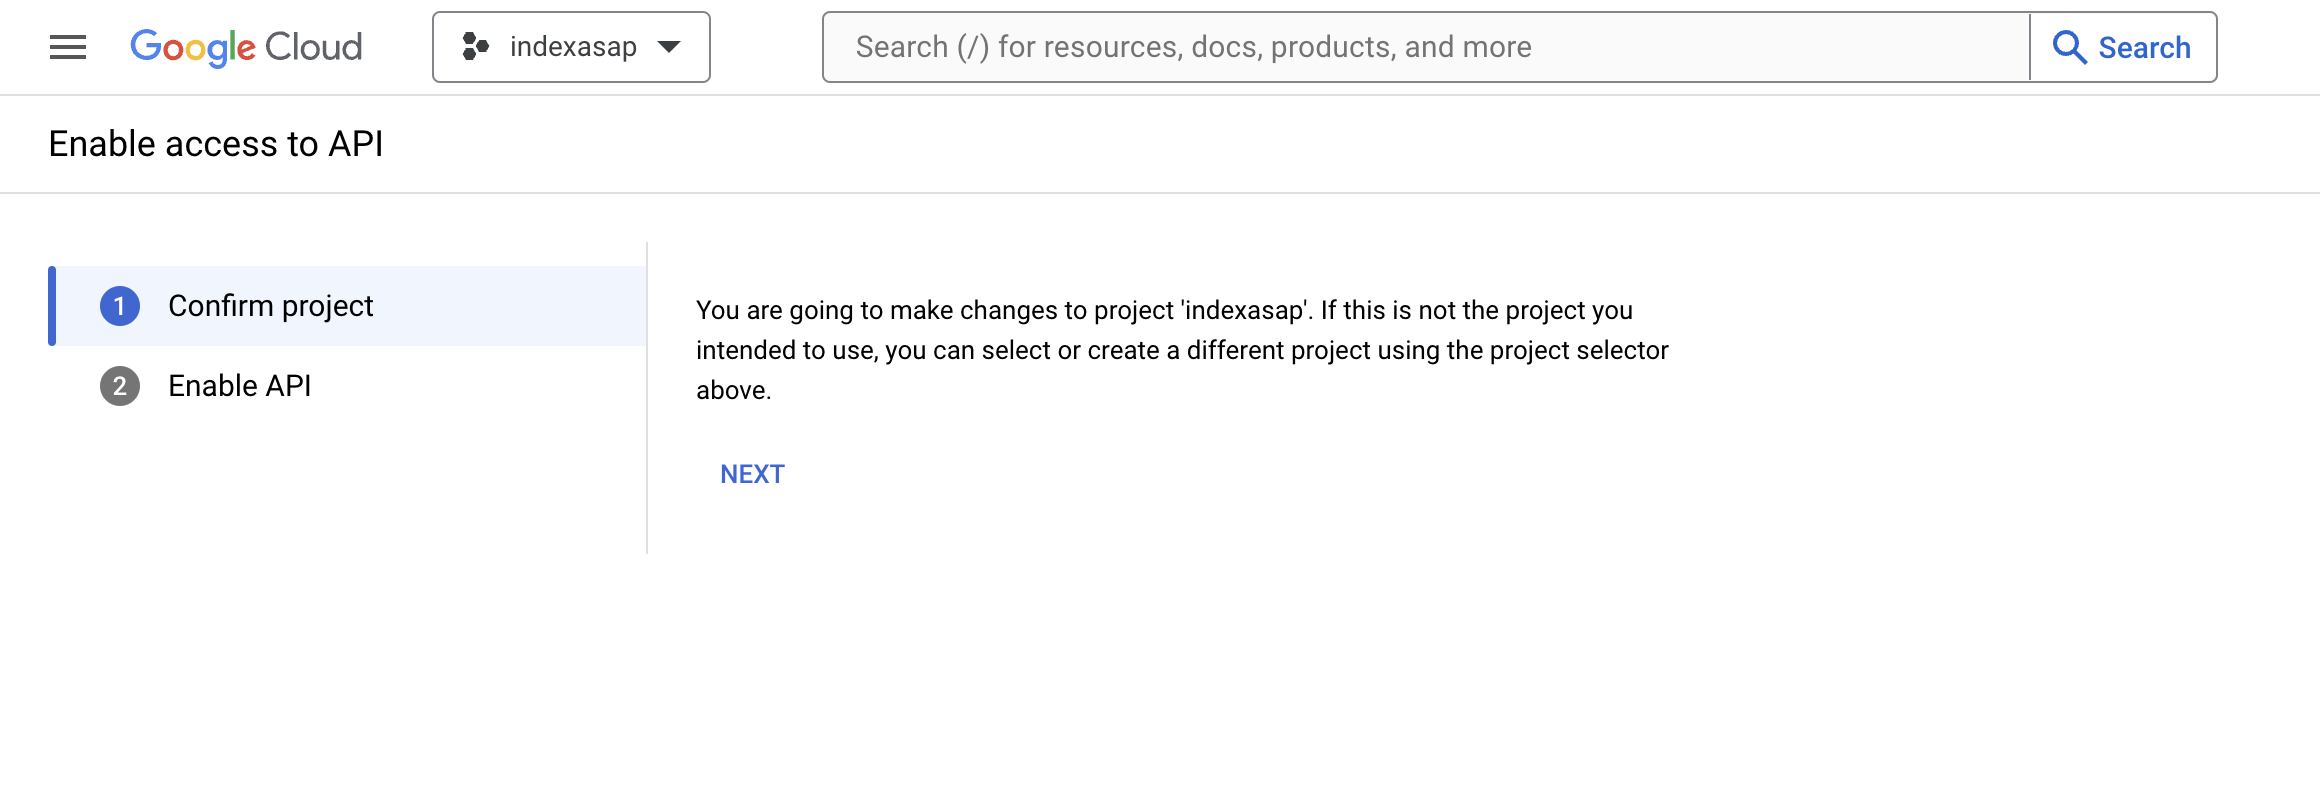
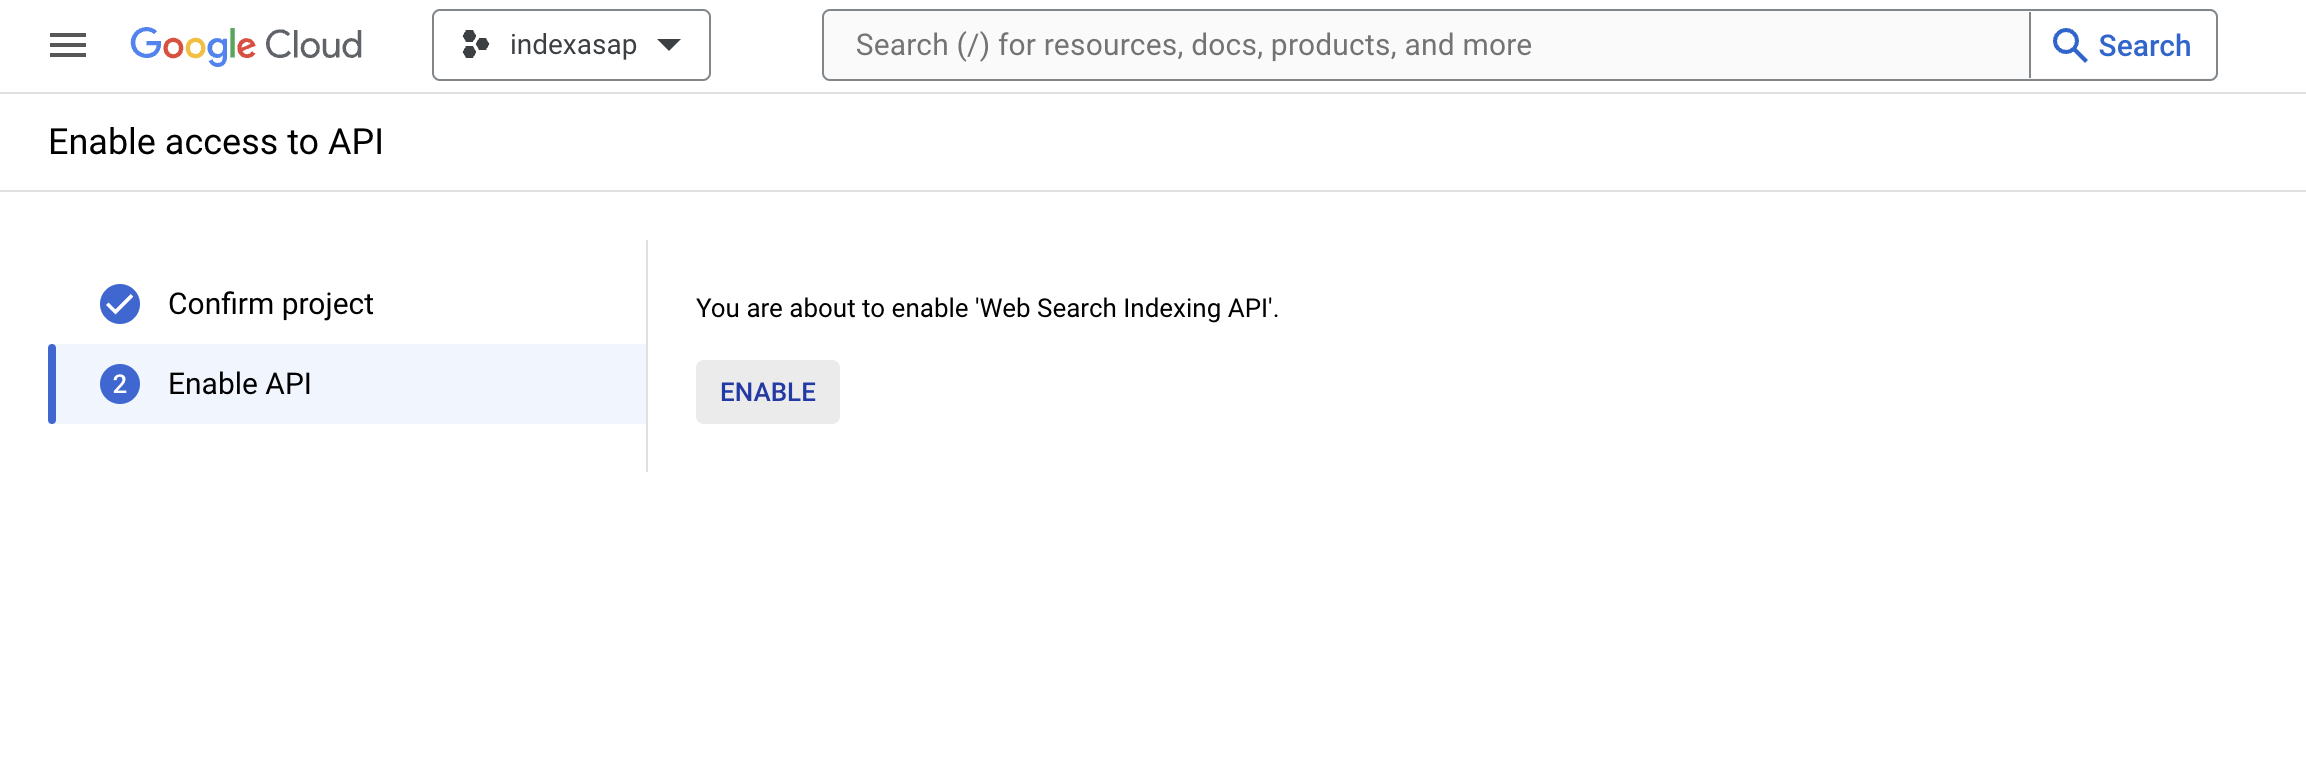
3. Enable Access to API
Navigate to this link: https://console.developers.google.com/flows/enableapi?apiid=indexing.googleapis.com&credential=client_key
Click on the “Next” and click the “Enable” button.
4. Navigate to Service Accounts
Open the “Service Accounts” page and select the project you created in the previous section from the dropdown menu.
Link: https://console.developers.google.com/iam-admin/serviceaccounts
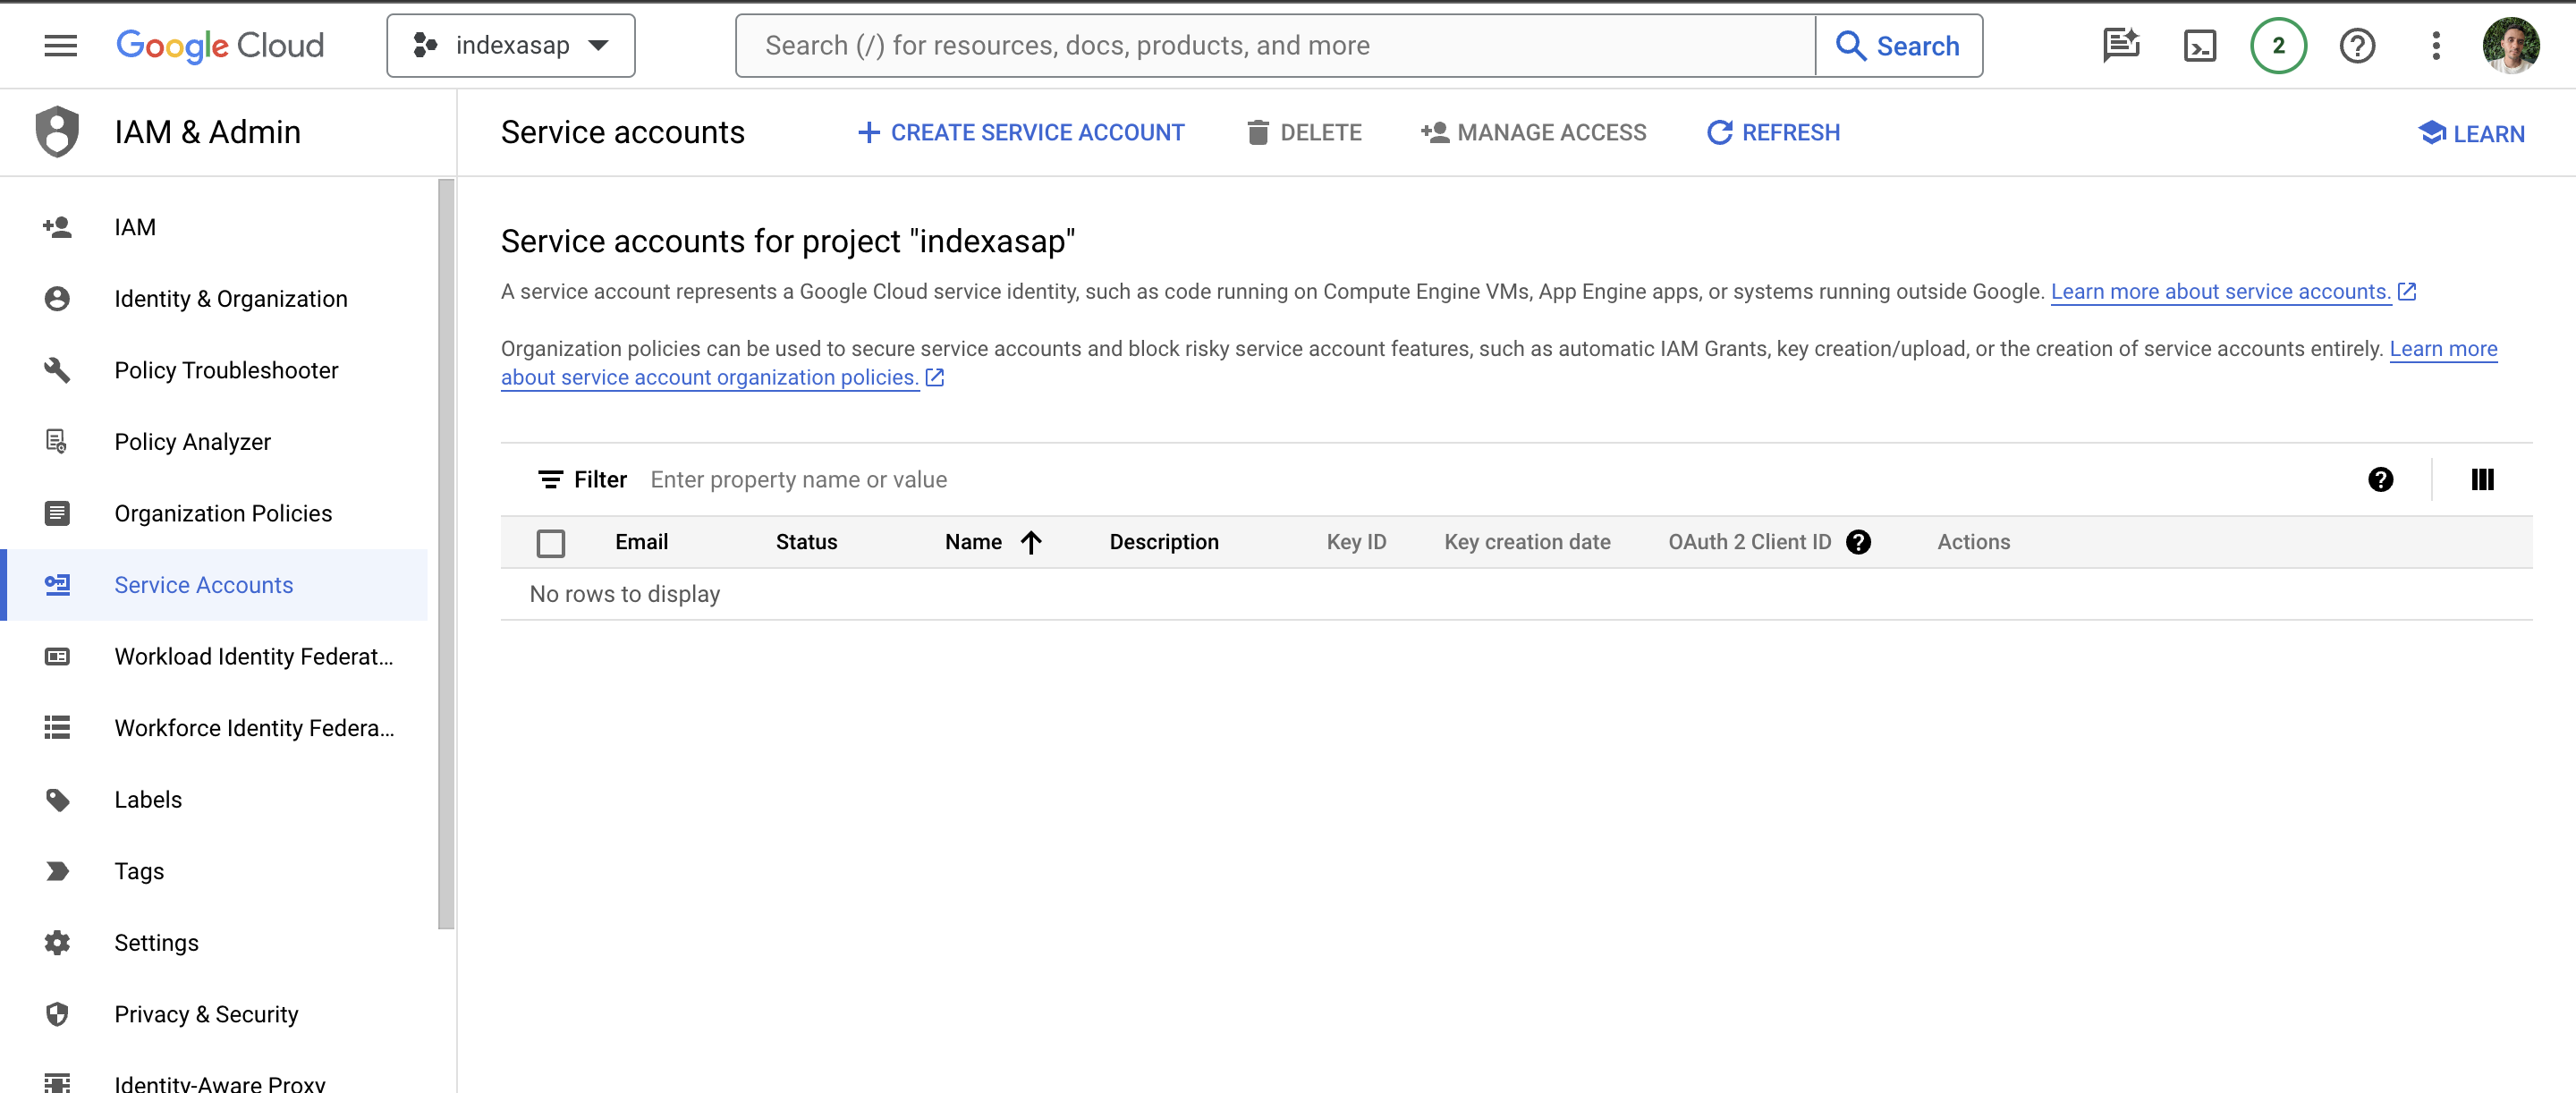
5. Create Service Account
Click on the “+ CREATE SERVICE ACCOUNT” button and enter a name and description for your service account. Click the “Done” button to create the account.

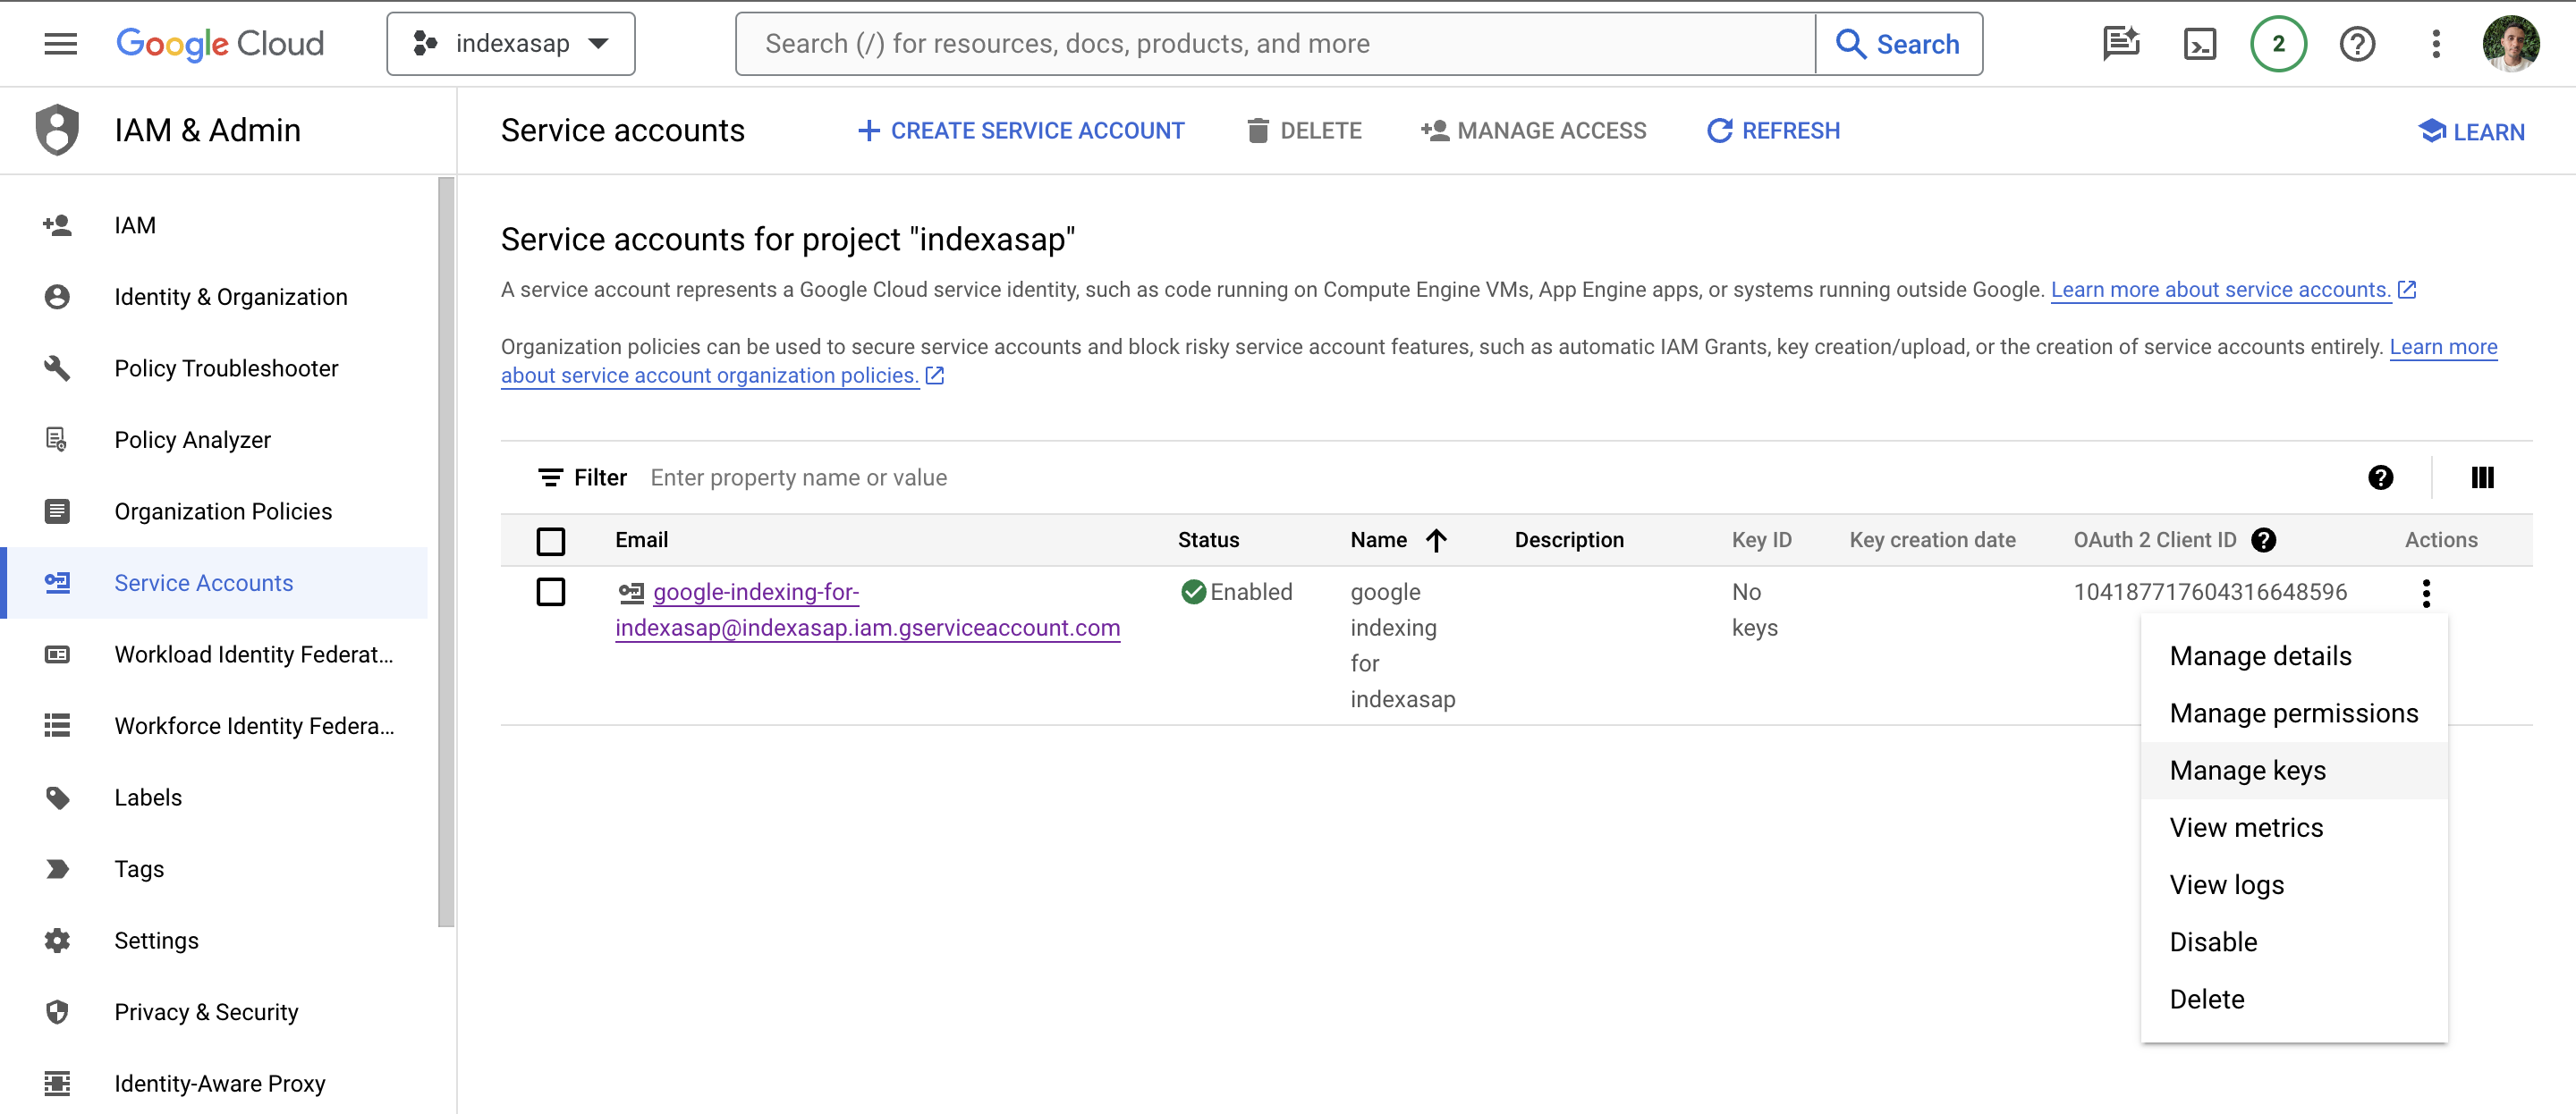
6. Manage Keys for Service Account
Click on the three vertical dots in the Actions column and select “Manage keys”.
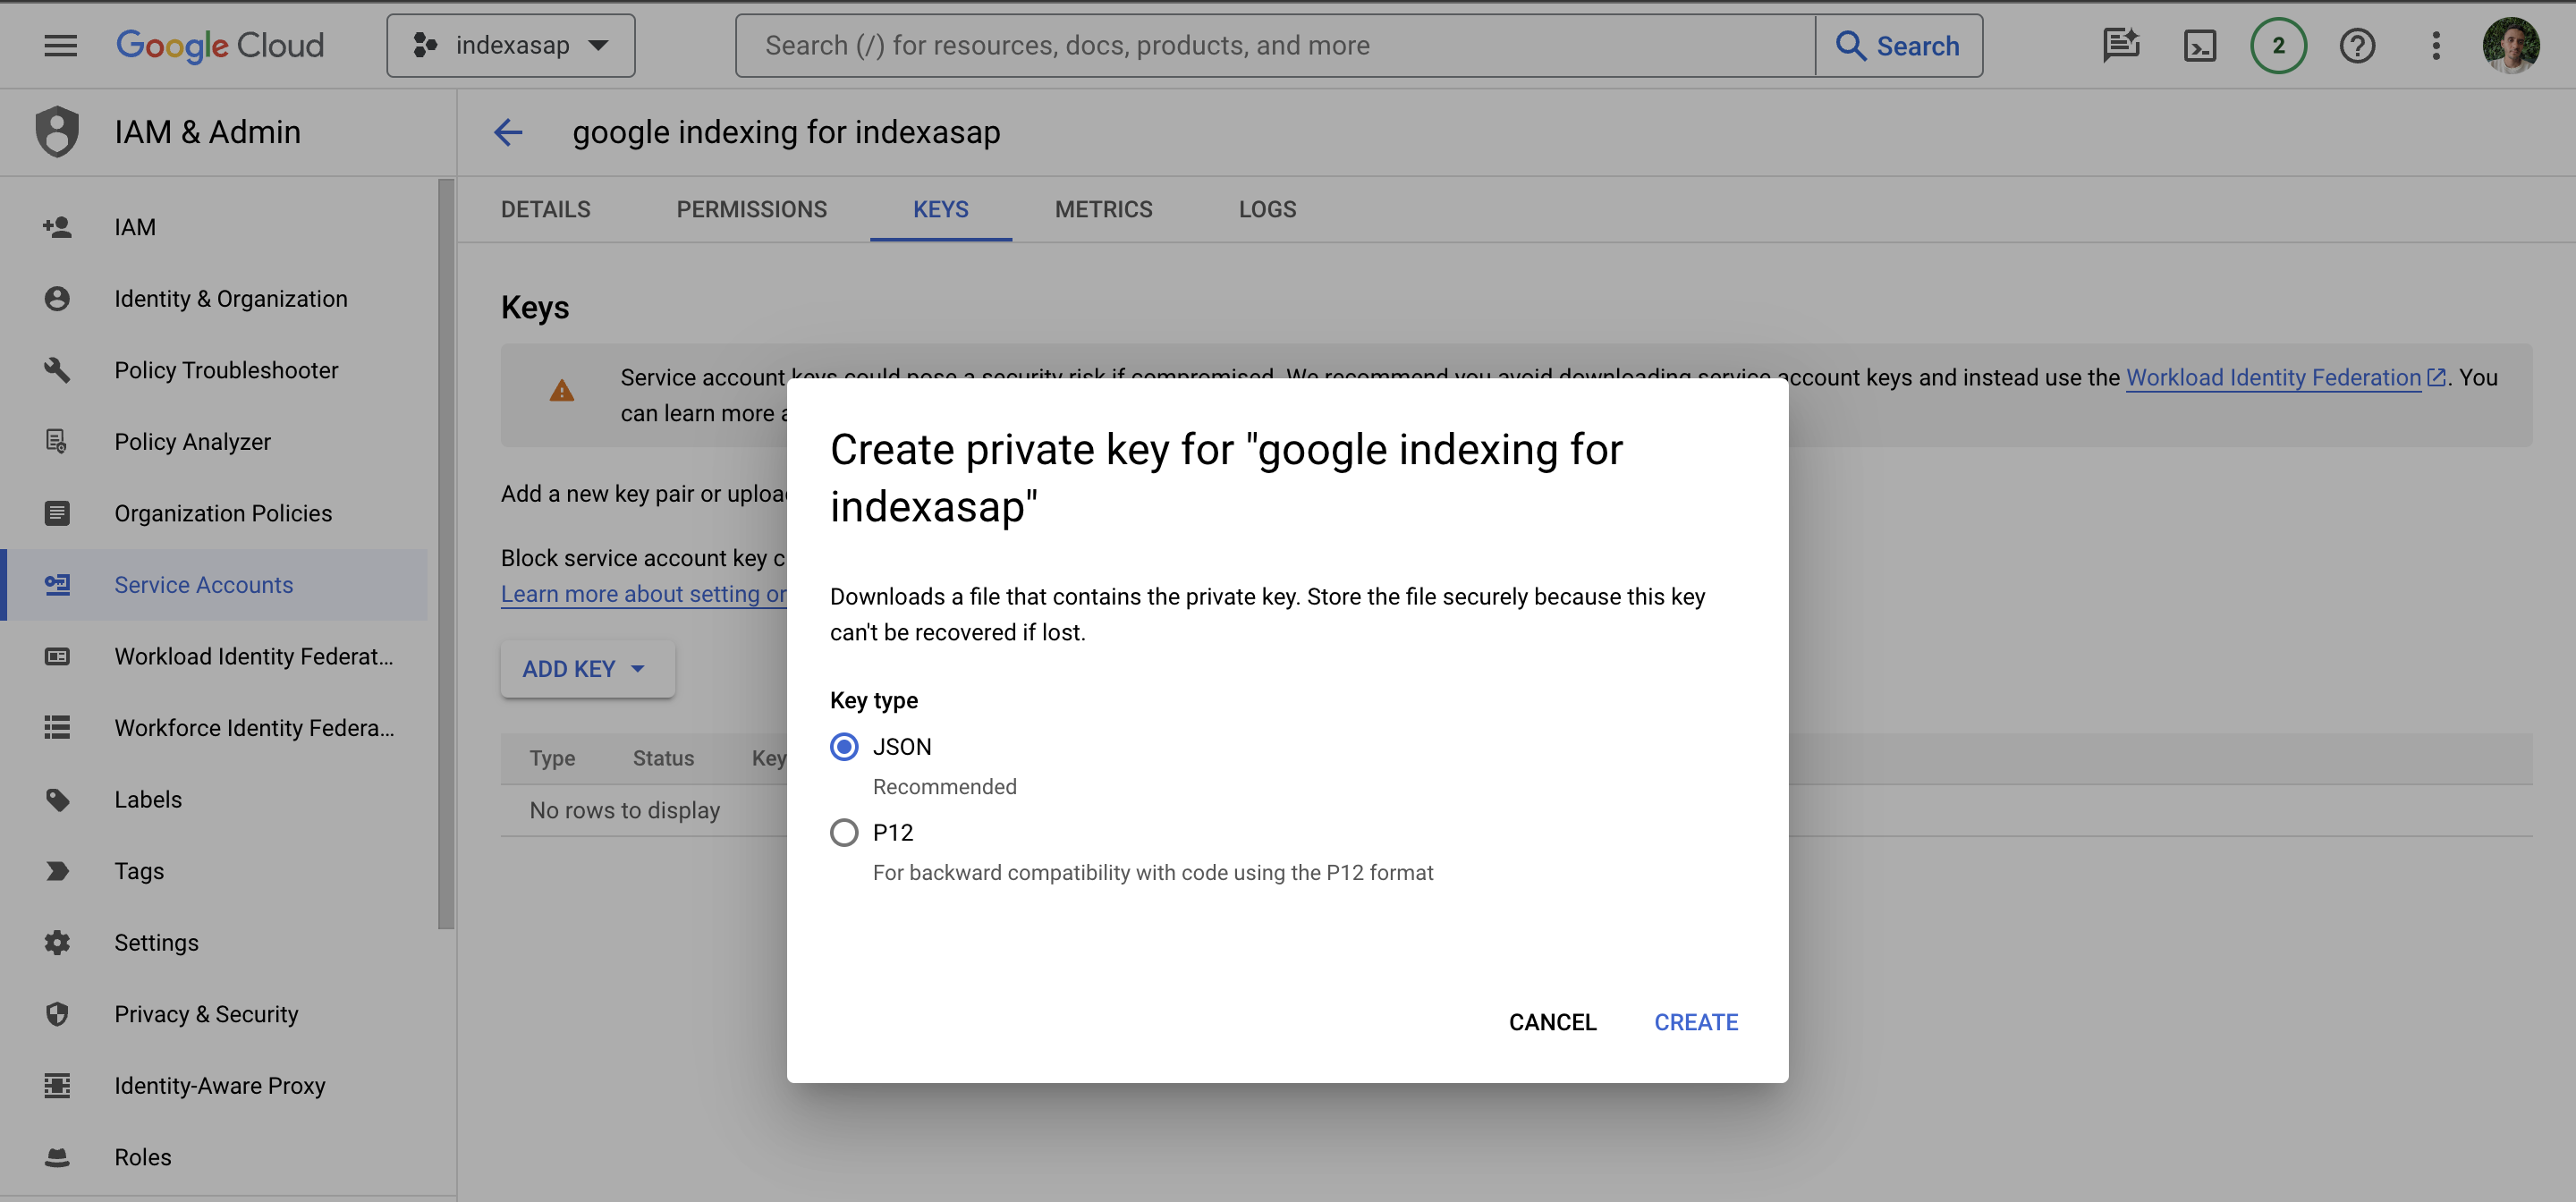
7. Create New JSON Key for Service Account
Click on the “+ ADD KEY” button and select “Create new key”. Choose the JSON format and click the “Create” button. This will download the JSON file that contains the API key.
Add the Service Account as an Owner of Your Google Search Console Property
Now, we need to add the email of the service key into Google Search Console to validate the ownership. You will need to have the domain name already configured on the Google Search Console dashboard. In case it's still not configured then follow the steps depending on your provider.
Link: https://www.google.com/webmasters/tools/home
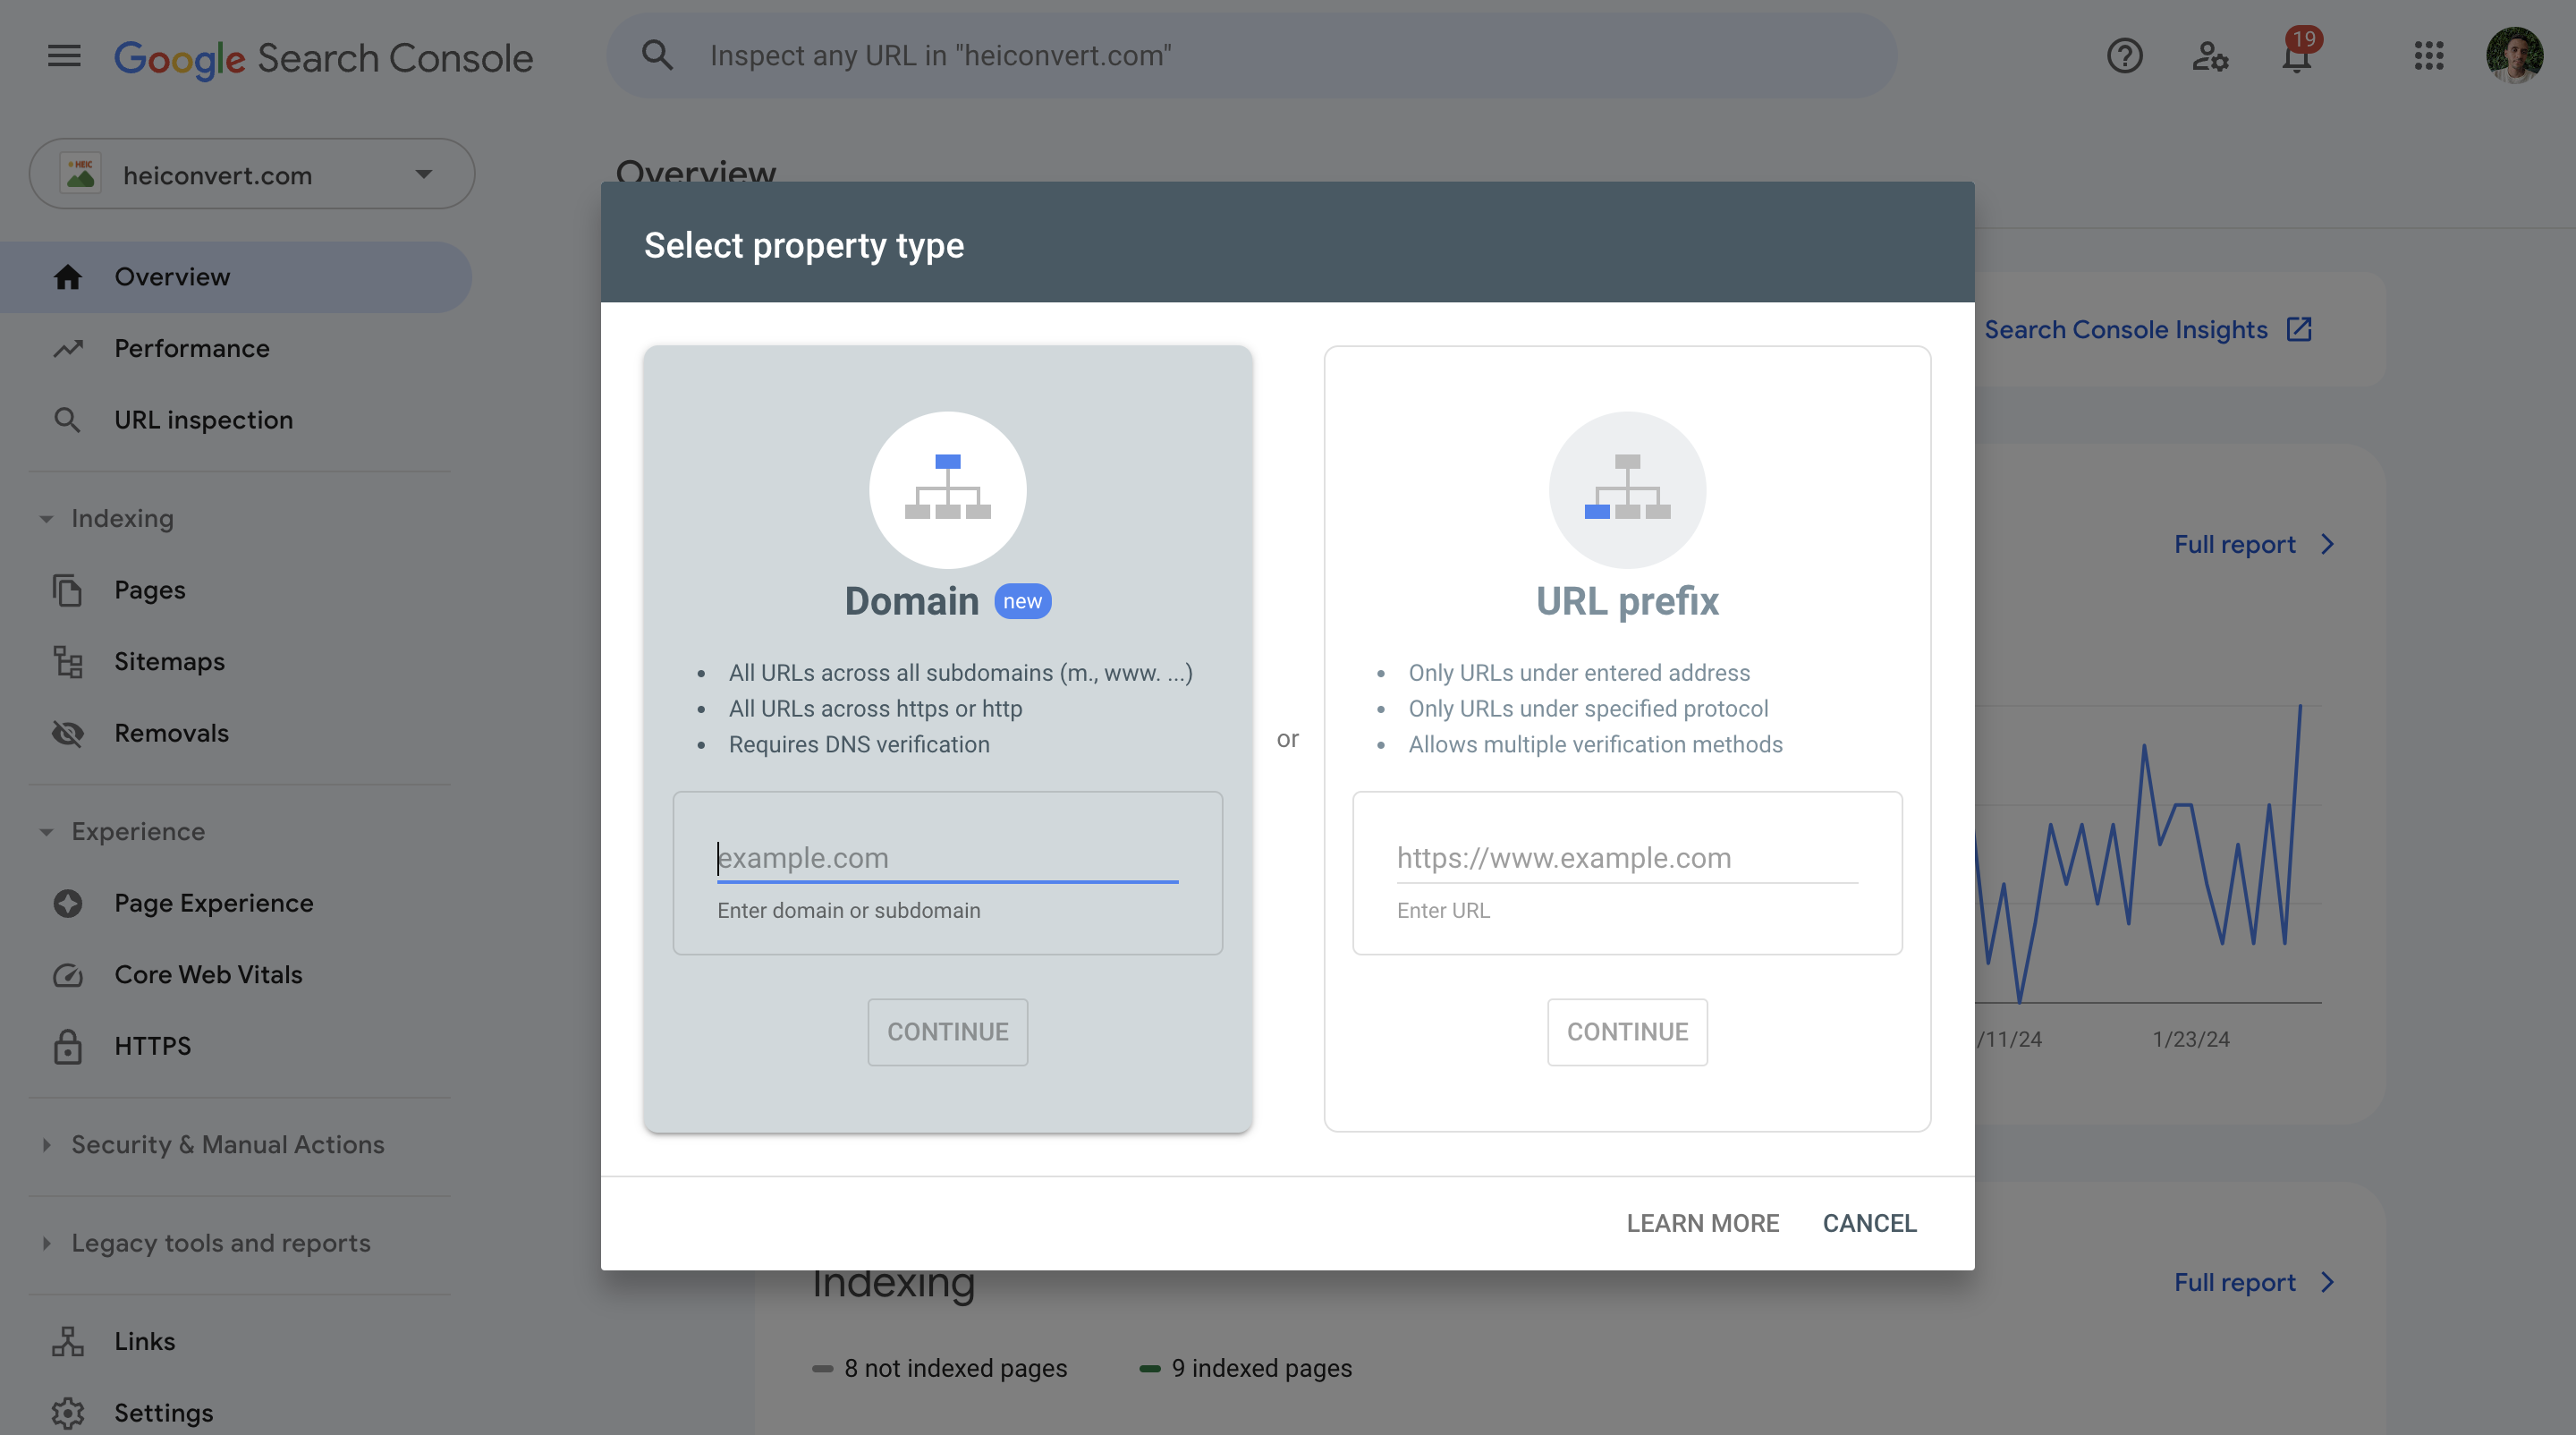
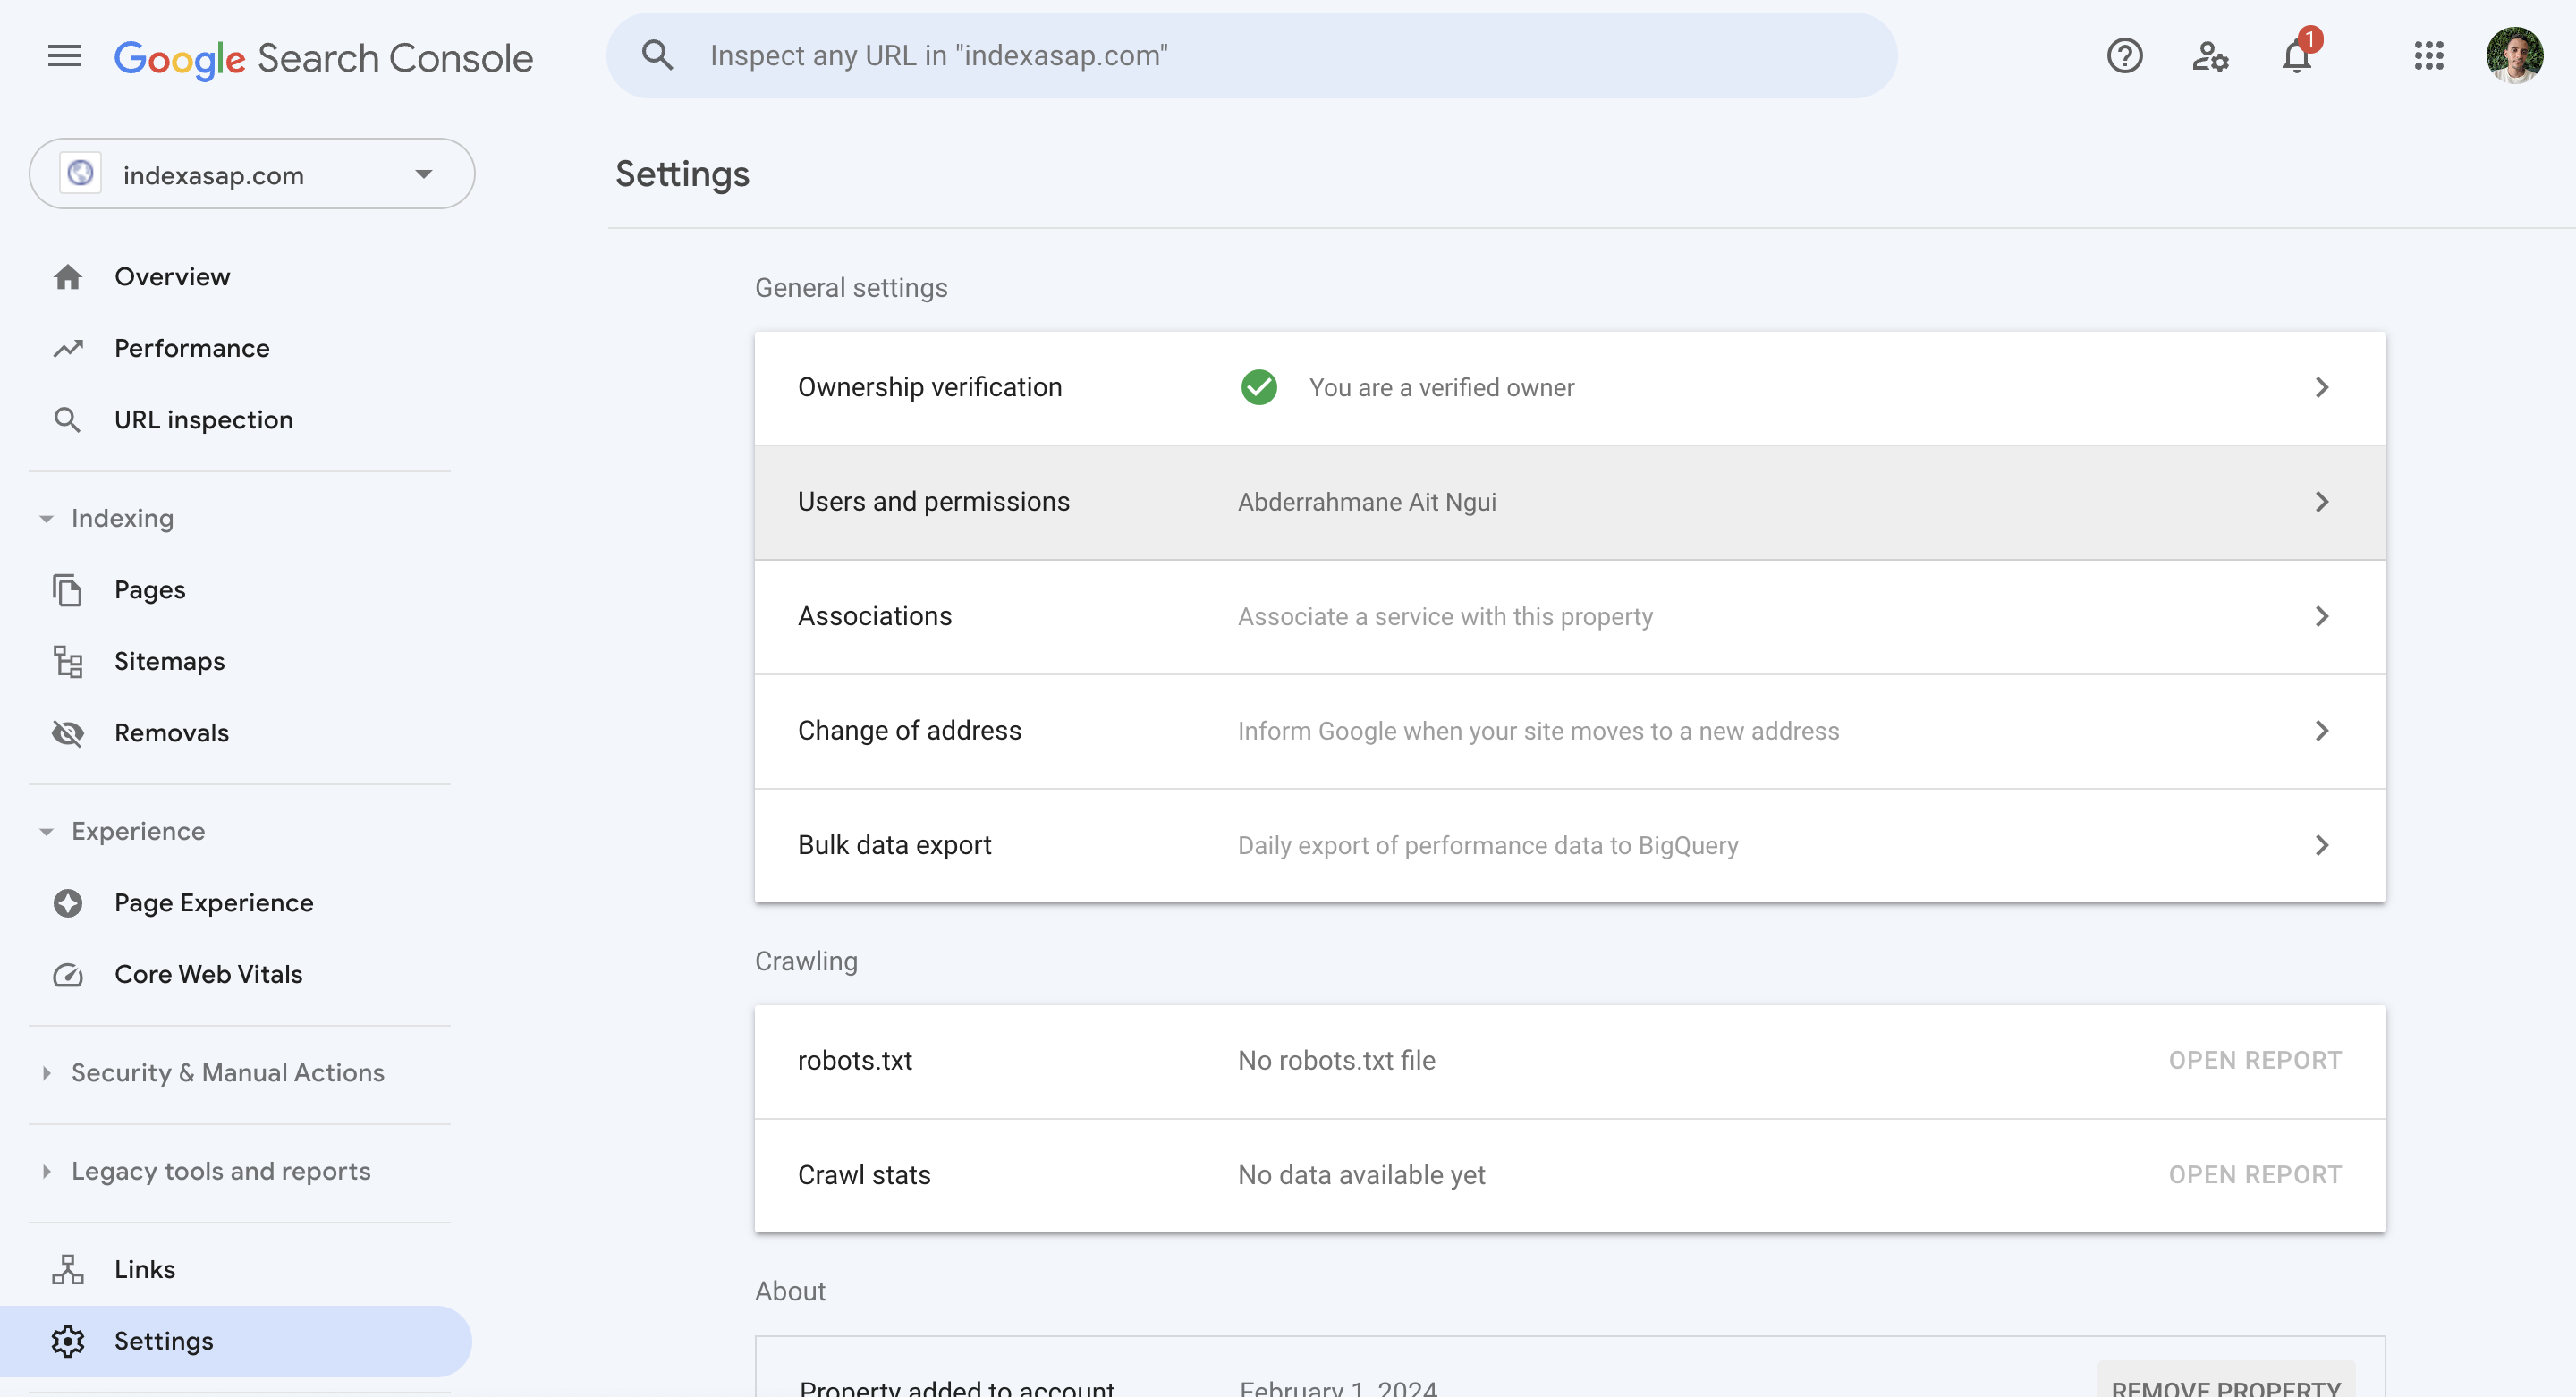
1. Navigate to Users and Permissions in Google Search Console Settings
Select your property and click the “Settings” option. Navigate to the “Users and Permissions” section.
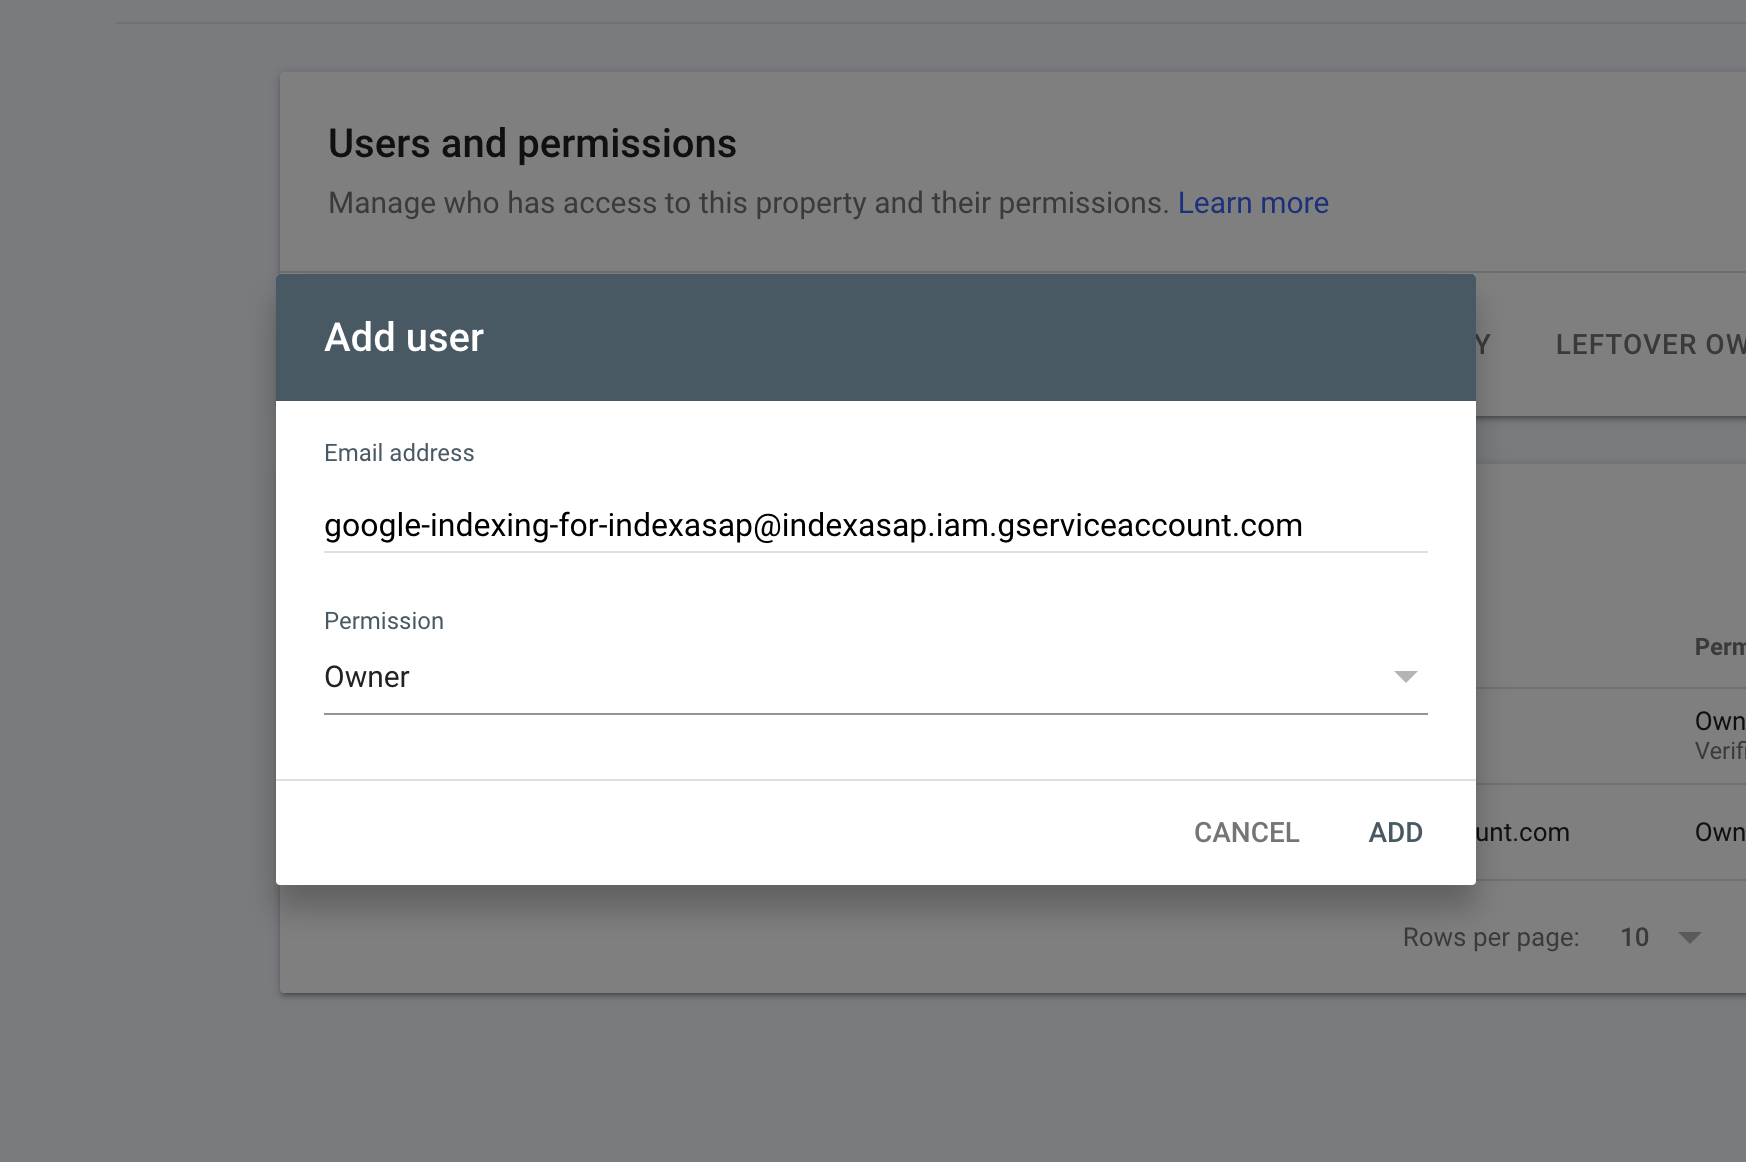
2. Add User to Your Search Console Property
Click on the “+ ADD USER” button and enter the service account ID in the email address field. Choose the Owner level permission and click the “Add” button.
In case you don't remember where to get it then here is where you can find it again:

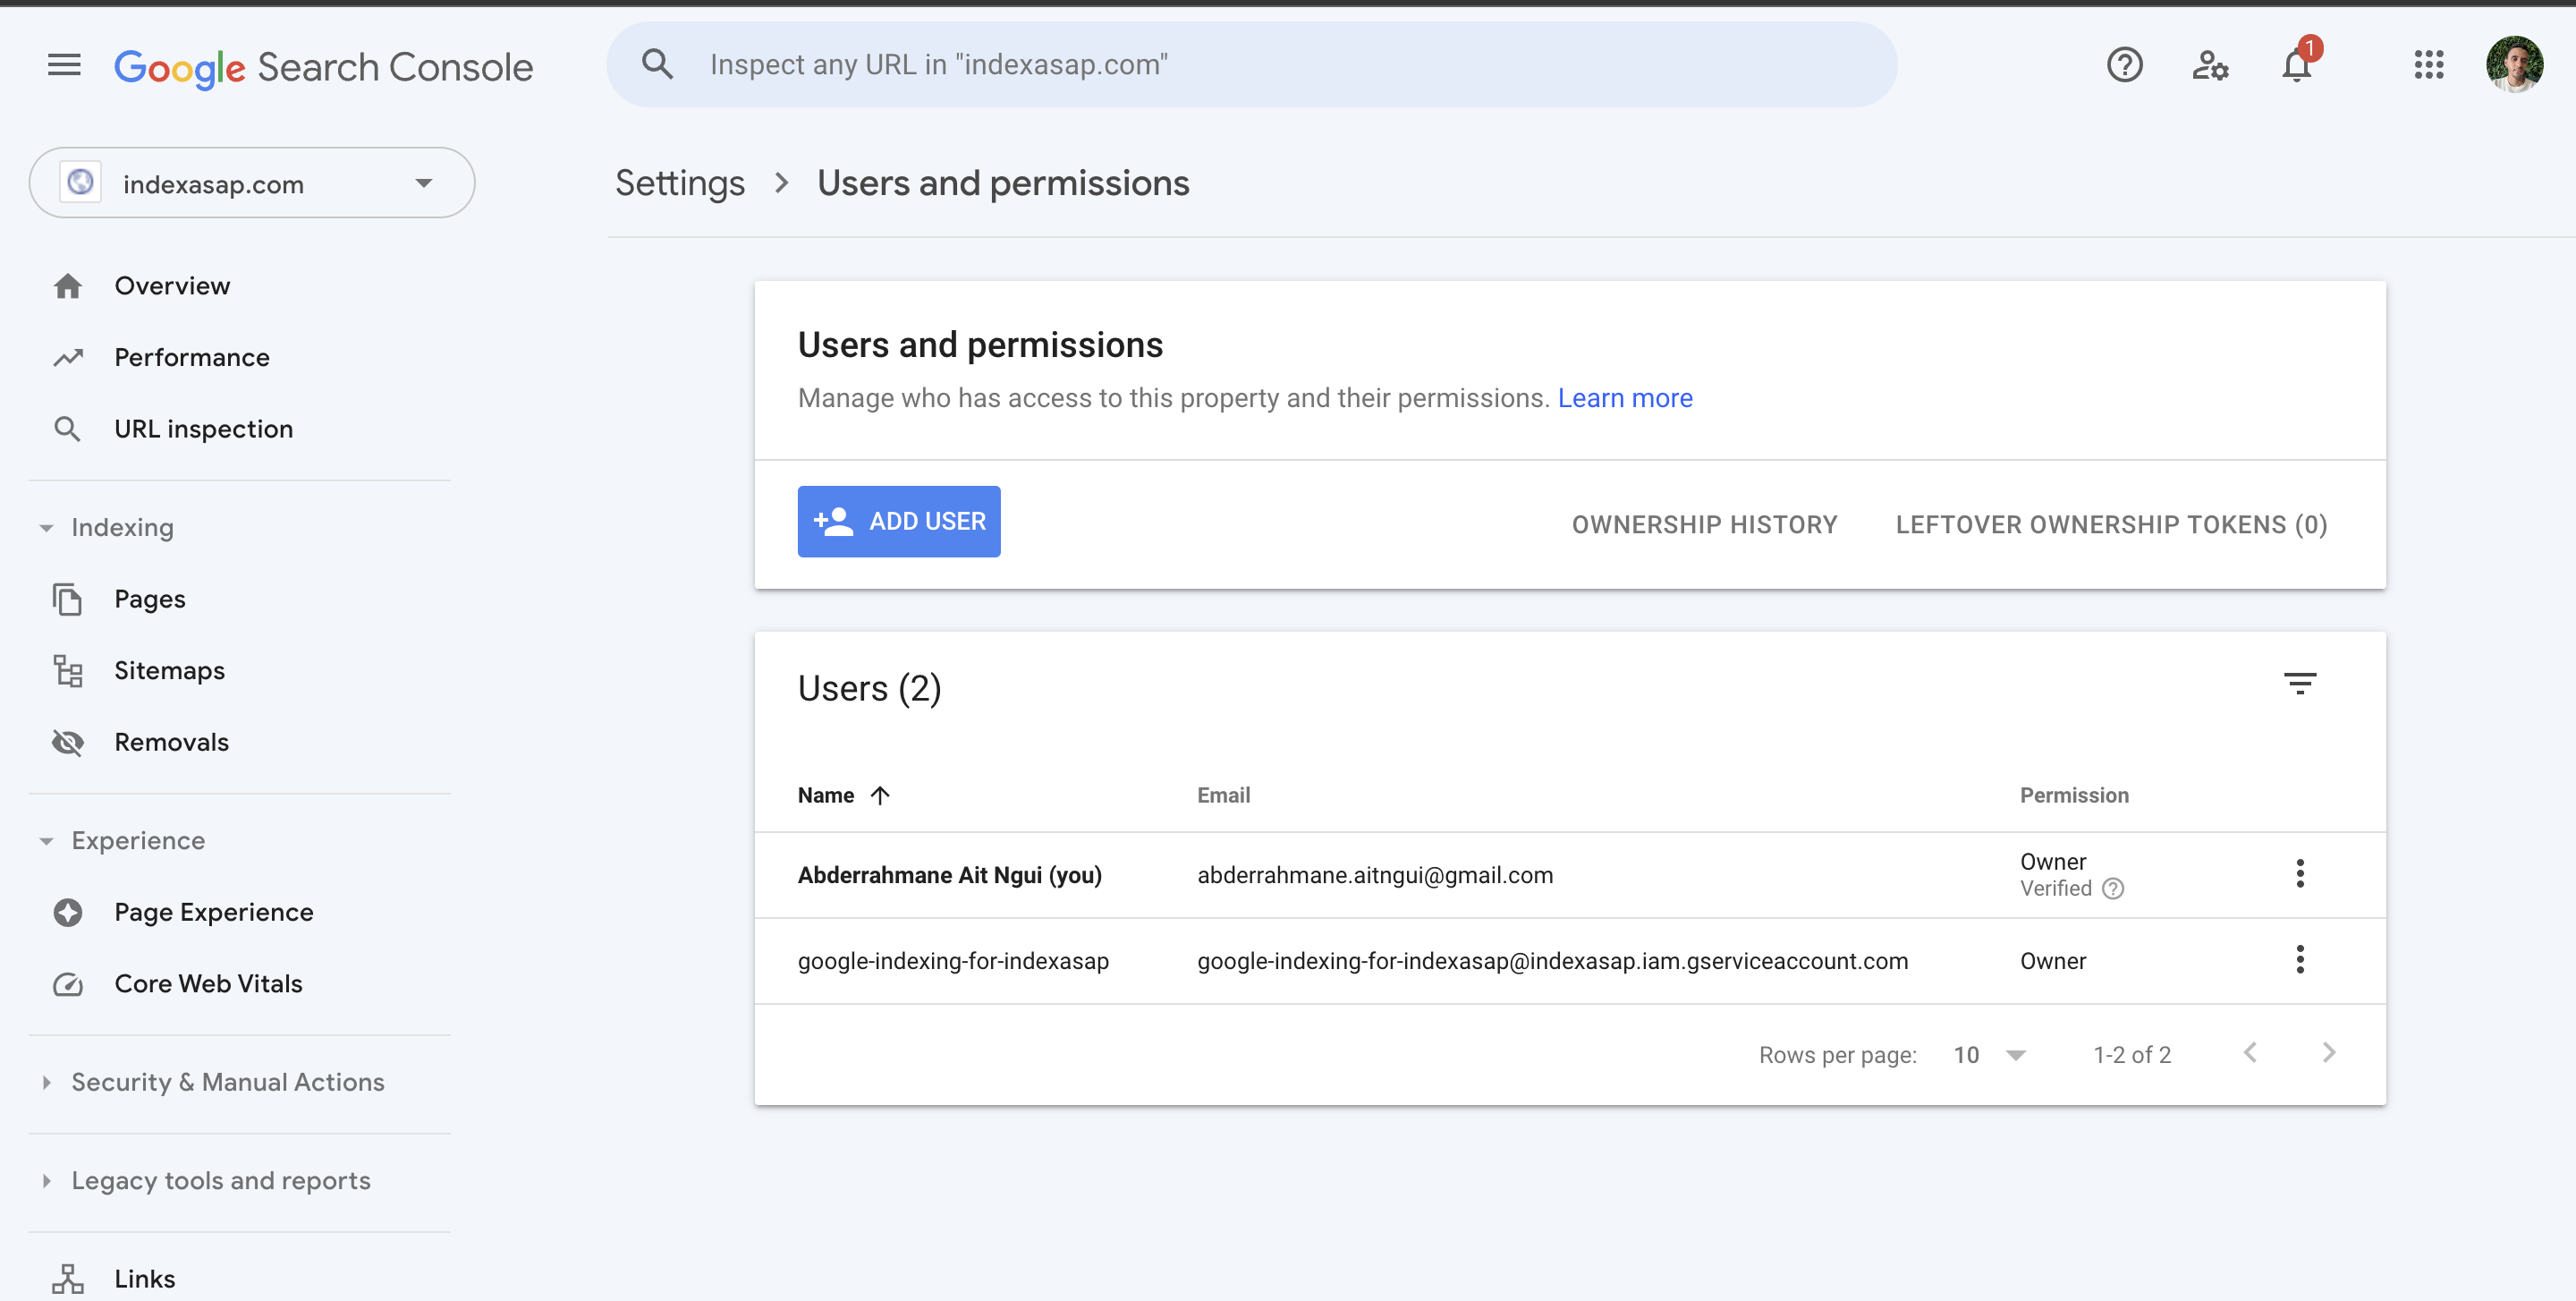
3. Delegate Service Account ID as Owner
Refresh the page and check the list of users to confirm that the service account has been added as an owner.
Conclusion
It's important to note that we prioritize the privacy and security of your service key. We do not use any database or application state in our servers, and the user data is never saved anywhere.
In conclusion, by following the steps outlined in this guide, you can effectively set up and utilize the Google Indexing API to enhance the indexing speed of your website. This powerful tool can significantly improve your SEO efforts and ensure that your content is promptly indexed by Google.